Quickstart
Fiberplane Studio helps developer teams build better incident workflows and automated, data-rich incident reviews.
Workflow
Fiberplane workflow relies on three key principles:
- describe and template your incident review requirements in code
- integrate with your alerting and on-call tooling and automate your reviews
- query and attach your observability data where needed
Creating your first template
Templates are central feature in Fiberplane enabling you to create incident workflows and programmatically set structure for your postmortems.
In this guide we will create our first template, upload it to Fiberplane, and add it to our incident workflow.
Prerequisites
A Fiberplane account: go to https://fiberplane.com/ and sign up for an account.
Steps
-
Download, install, and authenticate the CLI
Fiberplane CLI is the main tool to programmatically interact with Fiberplane resources (notebooks, templates, and daemons) from your local machine.
Installing Fiberplane CLI... brew install fiberplane/tap/fpInstalling Fiberplane CLI... curl --proto '=https' --tlsv1.2 -sSf https://fp.dev/install.sh | shFiberplane CLI source code is available on GitHub .
Ensure that you have the Rust toolchain installed and then:
Installing Fiberplane CLI... git clone https://github.com/fiberplane/fpcd fpcargo build --releaseOnce installed you can authenticate the CLI by running:
Authenticating Fiberplane CLI... fp login -
Initialize a template
To initialize a basic template in the current directory run:
Initializing a Fiberplane template... fp templates initThe command will scaffold a template and save it to a file
template.jsonnetin the current directory../template.jsonnet local fp = import 'fiberplane.libsonnet';local c = fp.cell;local fmt = fp.format;function(title='Replace me!')fp.notebook.new(title).setTimeRangeRelative(minutes=60).addLabels({}).addCells([c.h1('This is a section'),c.text('You can add any types of cells and pre-fill content'),]) -
Create the template in Fiberplane
Run the following command to create the template in Fiberplane passing in our source file
template.jsonnetas an argument.Creating a template in Fiberplane... fp templates create ./template.jsonnetThe command will prompt you for the title and description of your template, and will add the template to your Fiberplane account.
You can verify that the template is added by listing out all of your templates with
fp templates listor by navigating to your Fiberplane home screen’s Templates tab.
Adding a data source
Data sources can be added to Fiberplane notebooks using the Providers. Providers enable you to query them even if they are not exposed to the wider internet (using the Fiberplane Daemon).
How Providers work
Whenever you execute a data query in the notebook:
- The query is forwarded to the Fiberplane Daemon
fpdinstalled in your cluster; - The
fpdthen queries the Provider data source (e.g. your Prometheus or Elastic instance); - When the Provider returns the data, the
fpdprocesses, encrypts, and then returns it back to the Studio.
Set up the Fiberplane Daemon
The Fiberplane Daemon is a package that runs in your infrastructure. It enables you to connect the Fiberplane Studio to the data sources in your cluster(s) securely without exposing them to the Internet.
The Fiberplane Daemon is available as a container on Docker Hub.
-
Create an API Token
In the Studio
In order for the Daemon to receive queries from Fiberplane Notebooks, it needs to be authorized. This step will generate a Daemon API Token that will be needed in later steps.
You can do it in the Settings > FPD menu or using our CLI tool.
In order for the Daemon to talk to the Fiberplane Studio successfully it needs to be successfully authorized. This step will generate a Daemon API Token that will be needed later.
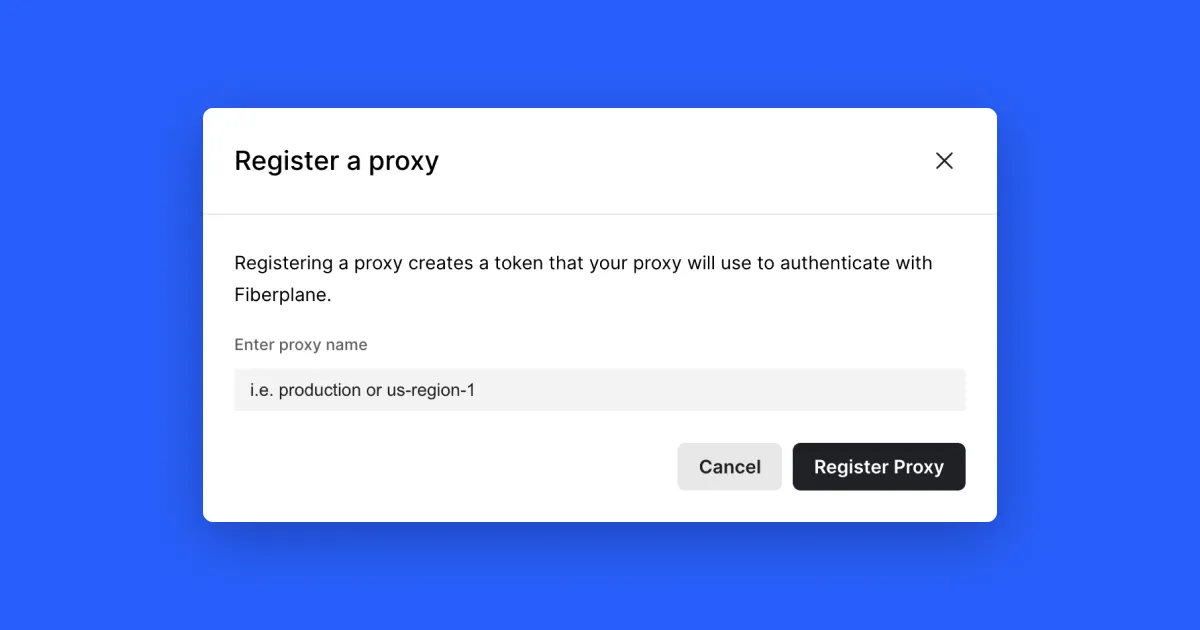
Go to your Fiberplane Settings page.
Click
+ Newto register a proxy with a name that identifies the cluster you will install it into (for example, “Production”). This will generate and display a Daemon API Token that the proxy will use to authenticate with the Fiberplane Studio. Copy the Daemon API Token generated in Step 2 for the next step.Using the CLI
Make sure you have the Fiberplane CLI installed.
To register a daemon run a command:
Creating an API token... fp daemon create my-daemonYou can leave out the daemon name to have one randomly generated, but we recommend naming it according to the environment it will be deployed to (for example,
production). Note that daemon names must follow the Fiberplane name format. -
Configure the data sources
We need to provide instructions for the daemon to look for data source APIs in the correct places. To do that create a
data_sources.yamlin your working directory. Here’s an example configurationdata_sources.yaml - name: prometheus-prodeescription: Prometheus (Production)providerType: prometheus # any of the currently supported Providersconfig:# Replace the following line with your Prometheus URLurl: http://prometheus -
Deploy the daemon
We can now deploy and authenticate the daemon using the API Token we have created earlier.
Run the following command (or add the equivalent of
docker-compose) in your terminal. Replace<FPD_API_TOKEN>with the API token you have created earlier.Deploying daemon as a Docker container... docker run \-v "$PWD/data_sources.yaml:/app/data_sources.yaml" \fiberplane/fpd:v2 \--token=<FPD_API_TOKEN>The fastest way to add the Fiberplane Daemon
fpdto your cluster is using the officially maintained Helm chart.Add the Fiberplane Helm chart repository
Terminal window helm repo add fiberplane https://fiberplane.github.io/helm-chartsCreate an
fpd-values.yamlfilefpd-values.yaml fiberplane:fpd_token: <FPD_API_TOKEN> # created in the studio or by running fp daemon createdata_sources: # list of data sources using fiberplane data source schema- name: prometheus-proddescription: prometheus in prodprovidertype: prometheusconfig:url: http://prometheus- name: loki-proddescription: loki in prodprovidertype: lokiconfig:url: http://lokiRun Helm install providing the values file as an argument
Terminal window helm install -f fpd-values.yaml fiberplane/fiberplane-daemon
Next steps
Let’s recap what we have done here so far:
- we have successfully created and initialized our first Template
- we have initialized and deployed our first Fiberplane Daemon
fpd - we have configured the
fpdto query the data sources in our closed off internal system
Where do we go from here? We can:
- set up a dedicated folder in our code for Fiberplane Templates and a GitHub Action to automatically update it when things change;
- connect more Providers to Fiberplane so we can have multiple sources of data in our notebooks;
- learn how to send data from our terminal sessions to notebooks.